
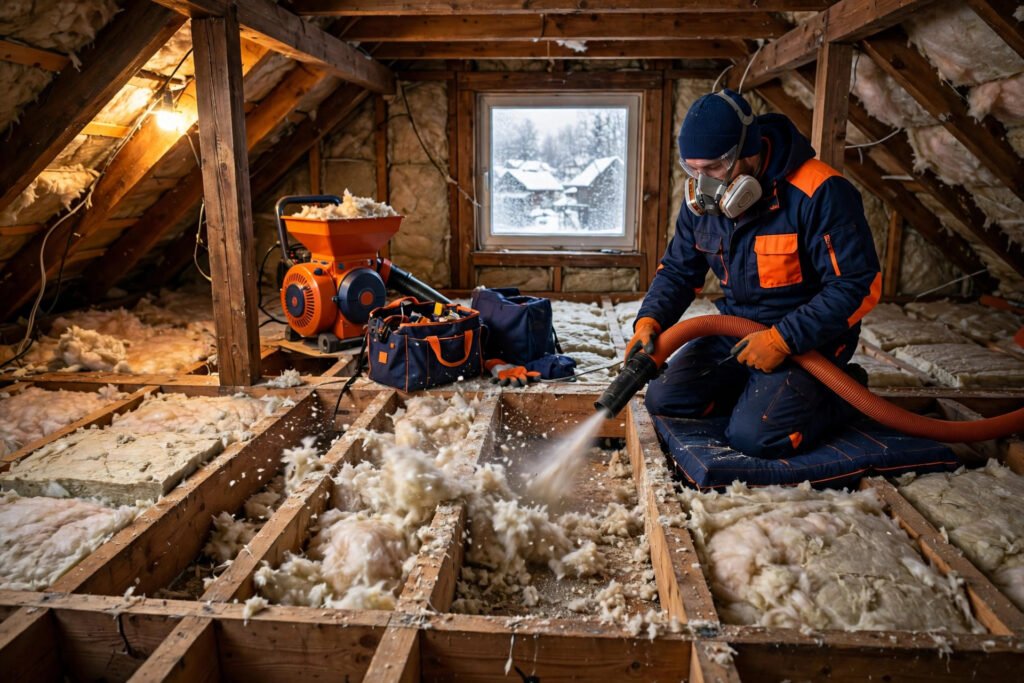
Insulation Cost in Winter: A Room-by-Room Plan to Stop Heat Loss Without Overspending
The first real cold snap tells you things no summer walkthrough ever did. The furnace runs and runs, the bedroom over the garage never warms up, the floor in front of the kitchen sink is cold through your socks, and one wall sweats every time the temperature drops. That is not just discomfort — it is a map. Your insulation cost this winter should follow that map, not a salesperson’s package deal. Heat escapes in a predictable order, and the cheapest place to stop it is almost never the place that gets pitched first. This is a seasonal planning guide, not a generic price list: walk the house in the order below, fix the leaks in priority order, and spend the bigger money only where the house itself proves it is needed.
Late November is actually a good moment to do this. You can still feel every draft with your own hand, attic work is safer in cool weather than in a 130-degree July attic, and insulation crews are easier to book now than during the January emergency rush. Start with an hour of detective work before you request a single quote.
Start with the one-hour heat-loss walk (before you price anything)
You do not need a blower door to find your worst leaks — though a professional energy audit that includes one is worth considering on an older home. You need a cold morning, a stick of incense or a thin strip of tissue, and a notebook. Work room by room while the heat is running:
- Attic hatch and pull-down stairs. Hold the tissue at the edges. A hatch that flutters the tissue is an open window into the attic all winter. Look up top, too: can you see the tops of the ceiling joists through the existing insulation? If you can, the attic layer is thin by modern standards.
- Recessed lights, bath fans, and plumbing vents where they pass through the ceiling. These penetrations are classic bypasses — warm air does not need a hole the size of a door; a dozen small gaps add up to one.
- Rim joists in the basement or crawl space — the band where the house framing sits on the foundation. On many homes this area was never insulated at all, and it is why floors above it feel cold.
- Exterior walls on the windward side, especially around outlets and switches. A faint draft at an outlet on an outside wall usually means the wall cavity and the box were never sealed.
- Windows and doors — but be honest about what you find. A single cold window in an otherwise warm room is a window issue. Every window feeling cold in a house with a thin attic is usually an attic issue wearing a window costume.
Write down what you find in plain language — “master bedroom: cold floor, drafty outlets on north wall” beats a contractor’s generic “needs more insulation.” That list becomes your scope. Every quote you collect should price your list, in your priority order, which is exactly the discipline our 12-step contractor hiring checklist applies to any trade.
One warning sign belongs here, before any material goes in: ice dams and icicles. Heavy icicles and ice ridges at the roof edge usually mean heat is escaping into the attic and melting snow unevenly — an insulation and air-sealing problem first, and a roof problem second. If your gutters are carrying ice all winter, fix the heat loss above the ceiling before you pay anyone to chase the symptom at the eave.
The priority ladder: where insulation money works hardest
Insulation does not pay back evenly. The same dollar buys very different results depending on where it lands, because warm air rises and because some areas start from nearly zero. For most US homes, the honest priority order looks like this:
1. Air sealing first — the cheapest step most quotes skip
Insulation slows heat transfer. It does not stop air movement. Blown or batt insulation installed over open gaps around pipes, wires, and top plates still lets warm air stream through — installers call it wind washing, and it quietly erases a large share of the material’s rated performance. Sealing those penetrations with foam and caulk before insulating is unglamorous, low-cost work — often a few hundred dollars in materials and labor when bundled with an attic job — and it is the difference between the R-value on the bag and the R-value you actually live with. Ask every bidder one direct question: “Is air sealing included, itemized, or not part of your quote?” All three answers exist in the market. Only the first two let you compare bids fairly.
2. The attic floor — almost always the best first dollar
Heat rises, attic access is usually open, and adding material there rarely requires opening walls. That combination makes the attic the highest-return insulation spend in most homes. Guidance for cold and mixed climates commonly targets roughly R-38 to R-49 in the attic (your climate zone sets the exact target — colder zones aim higher), and many older homes sit at half that or less. If you can see joist tops, you are almost certainly under-insulated by current standards.
3. Rim joists and basement / crawl-space edges
A can of spray foam or cut rigid foam plus sealant transforms this zone, and it is the direct fix for the cold-floor complaint that opens this guide. It is also small in area, which keeps the ticket small — frequently the best comfort-per-dollar item on the whole list after attic air sealing.
4. Walls — valuable, but rarely first
Filling empty wall cavities (usually with dense-pack cellulose through small drilled holes) makes a real difference in comfort and noise, and it is the right project for a home whose attic and rim joists are already handled. It costs more per result than attic work because access is harder, and it should almost never jump the queue ahead of the attic. Beware any pitch that starts with walls on a house with a visibly thin attic — that ordering serves the ticket size, not your heating bill.
5. Floors over unheated spaces and ductwork
Floors over a vented crawl space or an unheated garage benefit from insulation plus careful air sealing at the edges. Separately: ducts running through an unconditioned attic or crawl space leak heated air you already paid to warm. Sealing and insulating ducts is technically an HVAC-adjacent job, but in a leaky-duct house it can matter as much as another layer in the attic. If your system is aging, weigh that alongside the numbers in our HVAC replacement cost guide rather than treating insulation as a cure for a failing furnace.
Insulation cost by area: what each zone runs in 2026
Now the numbers — in priority order, not alphabetical order, so the table reads the way you should actually spend. All figures are national planning ranges for 2026; costs vary by region, materials, and scope, and your home’s access and existing conditions move any line within its band.
| Area / job (installed, 2026) | Typical planning range |
|---|---|
| Attic air sealing (penetrations, hatch, top plates), bundled | $350 – $900 |
| Attic — blown fiberglass or cellulose, add to ~R-38–R-49 (per sq ft of attic floor) | $1.50 – $3.50 per sq ft |
| Attic — fiberglass batts, new layer (per sq ft) | $1.00 – $2.50 per sq ft |
| Rim joist — spray foam or foam board + sealant (per linear foot) | $8 – $20 per linear ft |
| Wall cavities — dense-pack cellulose, whole-house typical total | $1,800 – $4,500 |
| Crawl space / floor insulation (per sq ft) | $1.50 – $4.00 per sq ft |
| Spray foam, closed-cell (per sq ft, ~3.5 in.) | $3.50 – $7.00 per sq ft |
| Spray foam, open-cell (per sq ft, ~5.5 in.) | $1.80 – $3.50 per sq ft |
| Insulated attic hatch cover / stair insulation kit, installed | $200 – $600 |
For a typical 1,000-square-foot attic brought up to modern levels with air sealing included, homeowners most often land around $1,800–$3,800 all-in. A rim-joist-only job on a typical basement often lands around $600–$1,500. Whole-house wall dense-pack is the bigger ticket above. Run your own attic square footage and material choice through our free Project Cost Calculator before quotes arrive, so you can tell whether a bid is pricing your house or a package.
Read bids for what is missing as much as what is listed: baffles to keep soffit vents clear, protection around heat-producing fixtures, hatch treatment, and disposal or leveling of damaged old material are all real line items that low bids quietly omit. Old insulation that is wet, moldy, or pest-damaged is a removal conversation, not a bury-it conversation — get that priced separately and in writing if it applies to your attic.
Choosing a material without the sales pitch
You will hear strong opinions. Here is the plain version:
- Blown cellulose — recycled content, settles into irregular attic spaces well, a common best-value choice for attics and dense-pack walls. Needs correct depth and density to perform as rated.
- Blown / batt fiberglass — widely available, familiar to every crew, solid value in attics. Batts perform poorly when compressed, cut sloppily, or installed over unsealed gaps — installation quality is the product here.
- Spray foam (open- and closed-cell) — insulates and air-seals in one step, which is why it excels at rim joists, cathedral ceilings, and awkward spaces. It is also the most expensive per square foot, needs a skilled crew and correct curing conditions, and is difficult to remove later. Reserve it for where its sealing property is the point, not as a default for a wide-open attic floor where blown material does the same thermal job for far less.
- Mineral wool — strong fire and sound performance, moisture-tolerant, often chosen for specific wall and floor assemblies at a mid-to-upper price.
R-value is per inch and it is only half the story — the other half is air sealing and installation quality, which is why two quotes using the same material can perform very differently. Ask what finished R-value (not just inches or bags) the quote guarantees, and get that number in the contract.
DIY vs. hiring a pro for insulation
This is one of the more genuinely DIY-able home projects — in exactly one zone, with real caveats:
Reasonable DIY: adding batts or renting a blower for loose-fill in an open, safely accessible attic after air sealing, with proper baffles, protective gear, and care around wiring and heat sources. Material-only cost can be roughly half the installed price.
Hire a pro when: the job is spray foam (specialized equipment and chemical handling — not a DIY material), walls need dense-pack (drilling, density control, and patching), the attic has knob-and-tube wiring, vermiculite or suspected asbestos-containing material (do not disturb it — get it tested and handled under the proper rules), evidence of mold or pests, or any roof-leak staining that should be diagnosed before new material covers it. Small sealing jobs — hatch weatherstripping, foam around a few penetrations, pipe insulation before a freeze — sit comfortably in handyman territory; our handyman cost guide and the handyman cost per hour breakdown show how that hourly billing works, and bundling those small fixes into one visit is the cheapest way to buy them.
Whichever route you choose, do not let anyone insulate over an active problem. A roof leak soaking new cellulose, like a window that leaks air because its flashing failed, needs the source fixed first — new material over an unfixed source fails early and hides the evidence.
A winter plan you can actually finish: two weekends, then one decision
Weekend one (a few hundred dollars at most): the heat-loss walk above, hatch weatherstripping and an insulated cover, foam and caulk at accessible penetrations, pipe insulation on exposed lines in unheated areas — frozen-pipe prevention that matters more, not less, once the house is tighter — and outlet gaskets on exterior walls. If exposed pipes run near a water heater in a garage or crawl space, that same visit is the moment to insulate them and confirm the heater’s own settings and age.
Weekend two (quotes, not work): collect three attic quotes against your written scope — air sealing itemized, finished R-value named, baffles and hatch included — and compare them in the Project Cost Calculator. Add rim-joist pricing as a separate line from each bidder; bundling it with attic work is usually cheaper than a standalone visit later.
The one decision: walls, or not yet? If the attic and rim joists are handled and a specific room still runs cold, you have earned the wall conversation with evidence in hand. If the attic is still thin, the decision makes itself — finish the top of the house first, live with it for a month of cold weather, and re-walk the house before spending on cavities.
Two money notes to close the plan. First, many utilities offer insulation rebates and some offer free or subsidized energy audits — check your own utility’s current program before you sign, because pre-approval is often required and retroactive claims are often refused. Federal tax incentives for insulation have existed in recent years under changing rules and caps; verify the current year’s terms on official sources before counting any credit in your budget, and keep the manufacturer’s certification and invoice if you do claim one. Second, be wary of the seasonal hard sell — a “winter special” that expires tonight, a free audit that only ever recommends the most expensive foam package, or a savings promise stated as a guaranteed percentage of your bill. Those pressure patterns are catalogued in our guide to contractor scams and red flags, and honest savings are always a range, never a promise: a well-targeted attic-plus-sealing job on a leaky older home is commonly associated with meaningful heating savings, while the same spend on an already-tight newer home returns far less.
Frequently asked questions
How much does insulation cost for an average house in 2026?
It depends entirely on which zones you treat. An attic brought to modern levels with air sealing on a typical home most often lands around $1,800–$3,800; rim joists add roughly $600–$1,500; whole-house wall dense-pack commonly runs $1,800–$4,500. Treating the right zone matters more than treating every zone.
What R-value should my attic have?
It depends on your climate zone — colder zones target higher values, commonly in the R-38 to R-60 range for attics under current guidance, with many mixed climates aiming around R-49. If you can see the tops of your ceiling joists, you are below target in almost any zone. Ask your bidder to quote to a named finished R-value for your zone.
Is spray foam worth the extra insulation cost?
Where air sealing and insulation need to happen in the same awkward place — rim joists, cathedral ceilings, irregular cavities — often yes. As a blanket choice for an open attic floor, usually no: blown cellulose or fiberglass reaches the same finished R-value for substantially less. Pay foam prices for foam problems.
Will new insulation lower my heating bill by a fixed amount?
No honest contractor can promise a fixed percentage. Results depend on how leaky and under-insulated the house was to begin with, fuel type, and thermostat habits. The leakier the starting point — thin attic, unsealed rim joists — the larger the realistic gain. Treat any guaranteed-savings pitch as a red flag.
Should I remove old insulation before adding new?
Usually no — sound, dry existing material can stay and the new layer adds to its R-value. Remove (with proper handling) material that is wet, moldy, fire- or pest-damaged, or suspected of containing asbestos, and never disturb suspected asbestos material yourself. Get that assessment in writing before new material is priced over it.
Prices are national averages for planning purposes; your local quotes will vary by region, materials, and scope. Always get at least three written bids on the same scope before you hire.
About this guide
This guide was researched and written by the Find Contractor editorial team for US homeowners. Cost figures are national planning ranges built by comparing multiple published 2025–2026 cost sources — they are not a quote. See How We Research Costs for our full method, and always get at least three written, itemized bids before you hire.